
Spark plug change, remove the air box lid and complete air box removal
By Allen Ulmer aka SRXSPEC
This will walk you through how to
change the spark plugs, remove the air box top, and remove the air box itself.
First we'll start with the tools needed.
-4mm "T" handled Allen Wrench
-5mm "T" handled Allen Wrench
-1/4" drive ratchet
-Short 1/4" drive extension
-1/4" drive 10mm socket
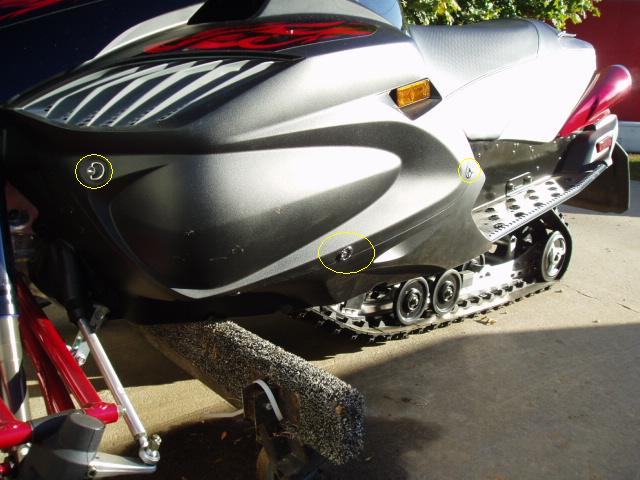
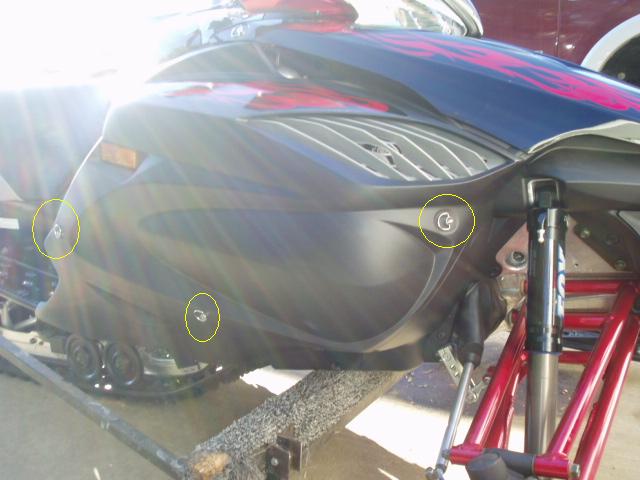
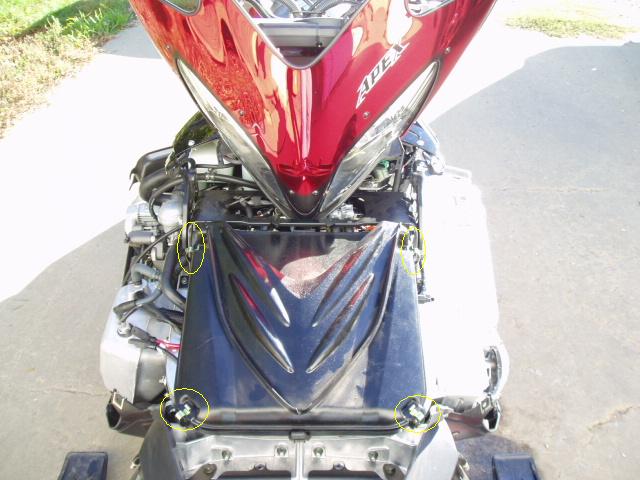
Next I assume most of you know how to
remove the side panels and center section of the hood, but here's a good picture
showing the dsuz fasteners anyways!
The easiest way I've found to remove the side panels is to give a gentle tug on
the front and then slide it down and forward and they will come right off.
For the hood I like to grab the outside edges, lift up slightly, and slide it
towards the front of the snowmobile until it comes off the hook in front.
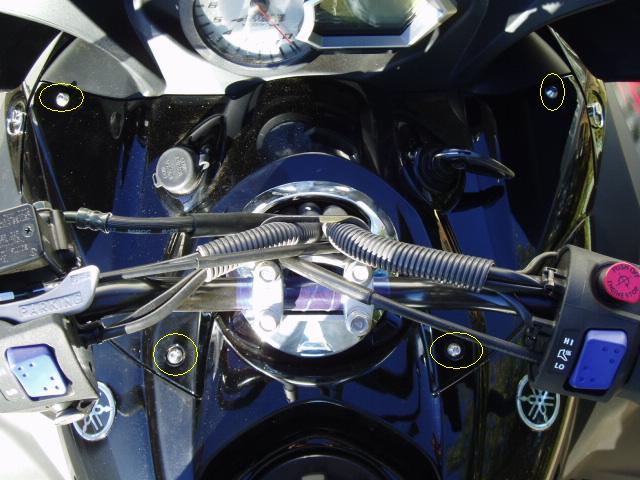
On the access panel in between the handle bars and the gauge pod there is four
5mm Allen head 1/4 turn fasteners that need to be turned. This panel also has 3
tabs that slide into the gauge pod and can make it difficult to pull it up or
remove it.
Next we'll talk about getting to the
spark plugs. This is
my way of
doing it only. There may be faster or simpler ways, but this is the way that
I've found to allow the best access and also is fairly fast. I like to loosen
the head light and slide it forward and out of the way.
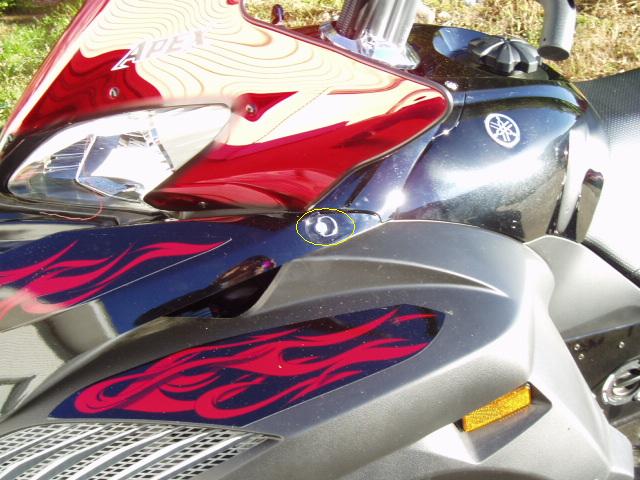
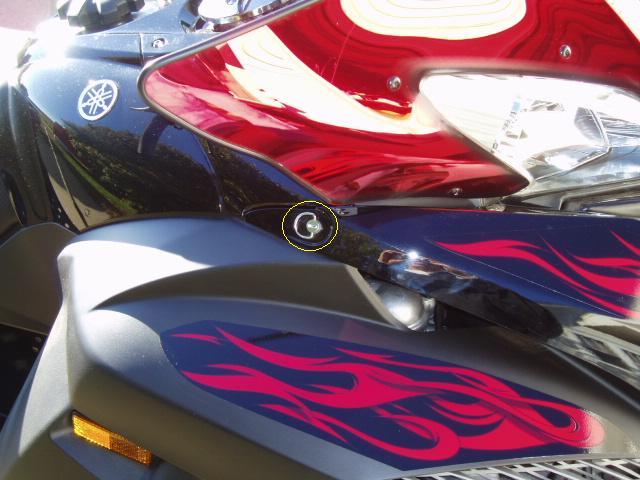
First loosen the accessory panel 1/4 turn Allen head fasteners.
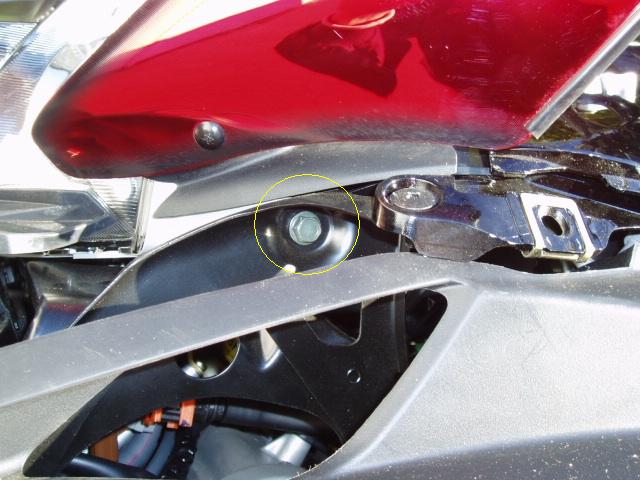
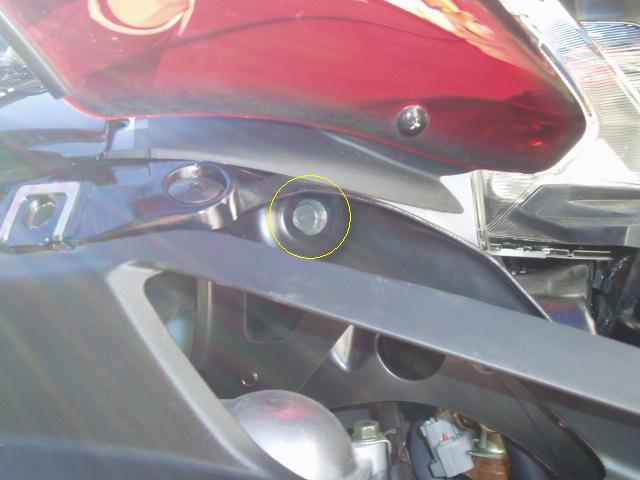
Second there is a bolt on each side of the head light that requires a 10mm
socket to loosen. Loosen and remove these and slide the head light forward and
let it sit on the air box.
Then I like to disconnect the key switch and simply slide the access panel
around the steering post and let it sit on the fuel tank cover.
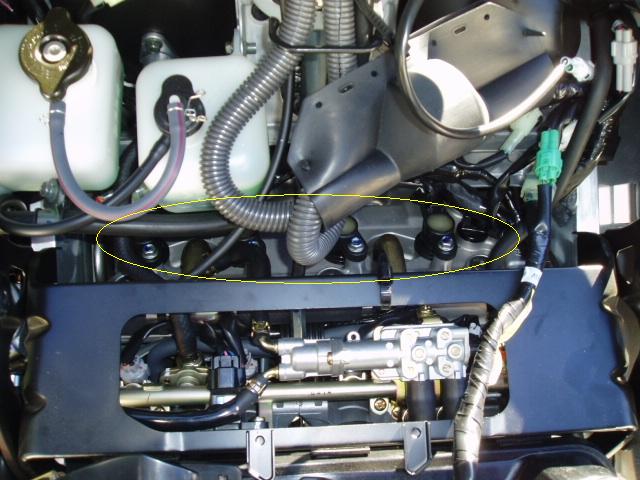
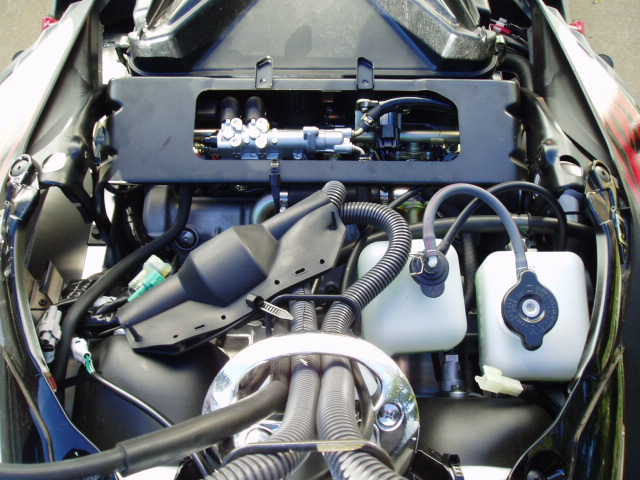
Last you now have open access to the spark plugs. Remove the 10mm bolt on each
spark plug cap and use the spark plug wrench in your tool kit to remove or
replace all the spark plugs. This will take roughly 5 minutes from start to
finish if you had to change a plug on the trail, but I doubt that will ever be
needed!

Next we'll talk about air box top
removal.
If you read along above you'll see we now have the head light loose. I like to
lift the head light up and move it back where the accessory panel would sit to
allow us easy access to the air box top.
First you'll have to unlock the 4 latches that sit on each corner.
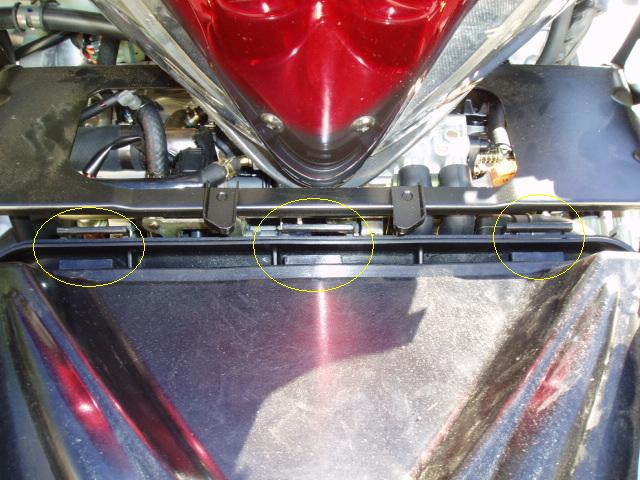
You'll see there are 3 slots and tabs that help align the air box on the back.
To remove the air box lid you must lift the front (closest to the bumper) of the
air box lid up and it will disengage the tabs in the rear, the same goes for
reassembly, position the front up and slide the tabs in and close it.
Last but certainly not least we'll
talk about air box removal.
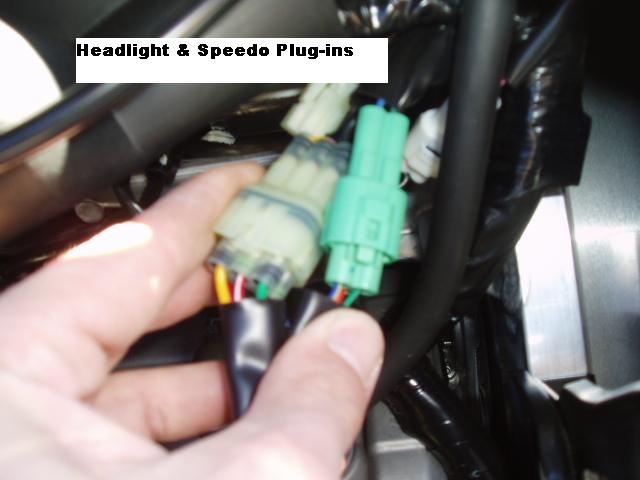
I like to remove the head light completely for this task. Since it is already
loose all we have to do is simply unplug the two plug-ins that run to it.
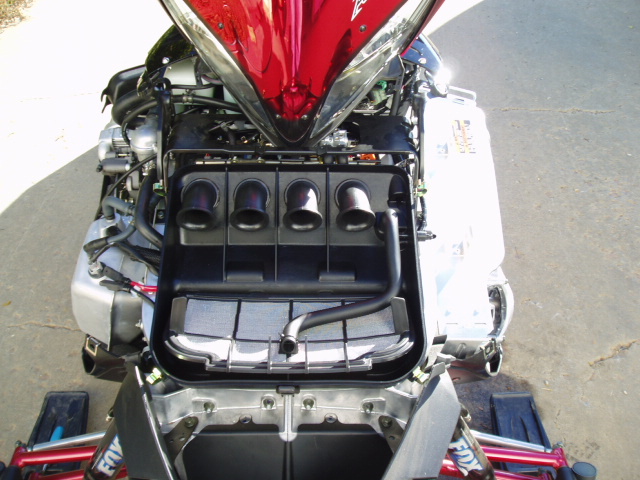
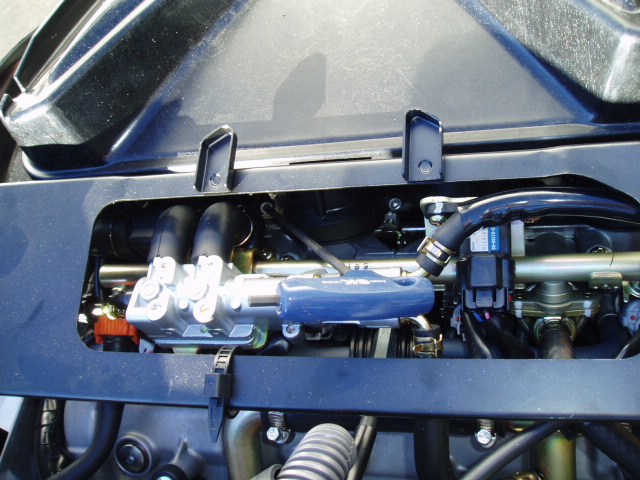
First you will need to take your 4mm wrench and loosen all four of the clamps
holding the air box onto the throttle bodies.
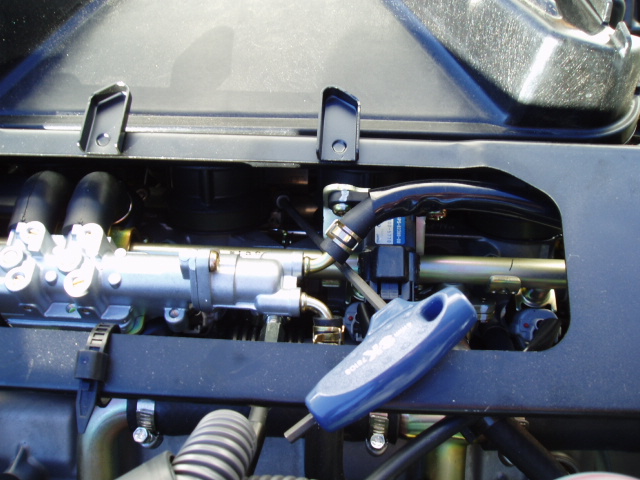
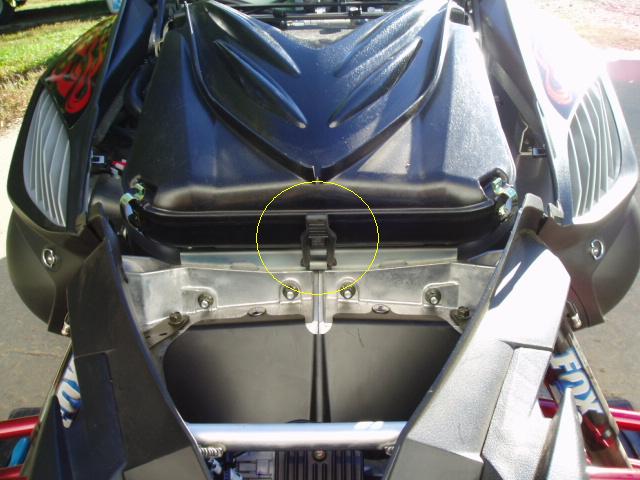
Second you will need to unhook the rubber strap on the front of the air box so
you can lift and manuever the air box.
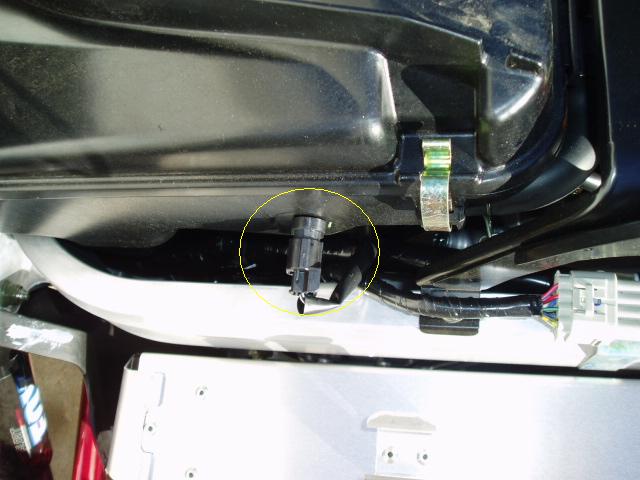
Third we will then unhook the air temp sensor that is in the side of the air
box.
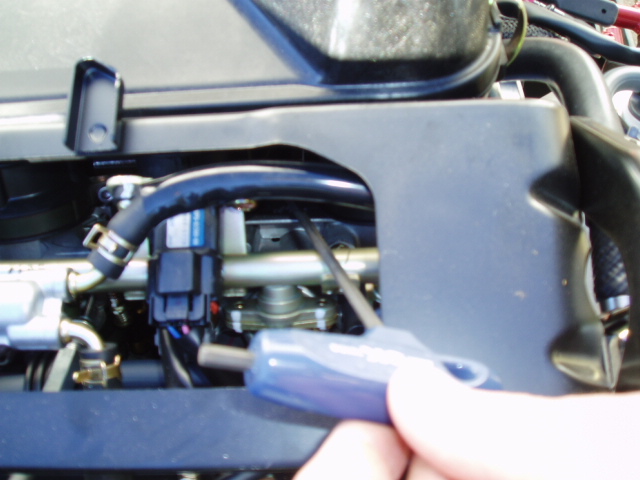
After unhooking the temp sensor you should be able to lift the air box slightly
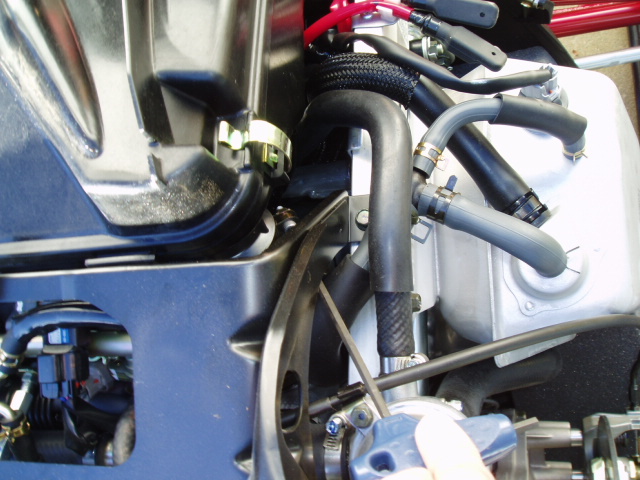
and unhook the crankcase vent going into the bottom of the air box.
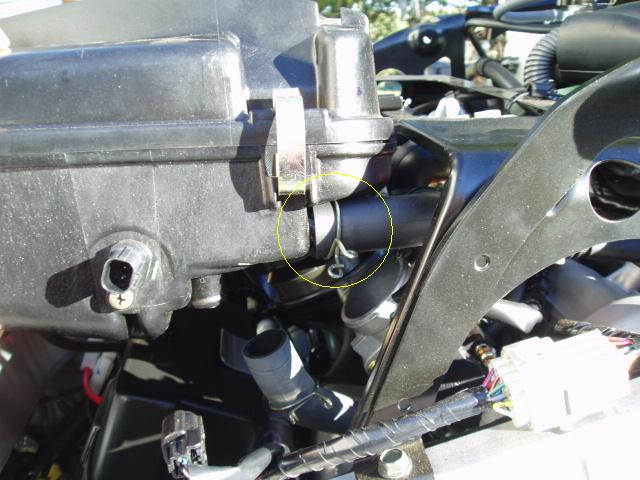
Next we will unhook the line going to the manifold pressure sensor.
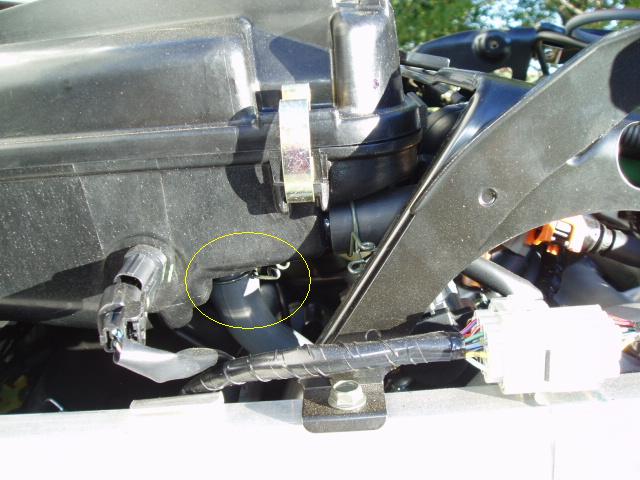
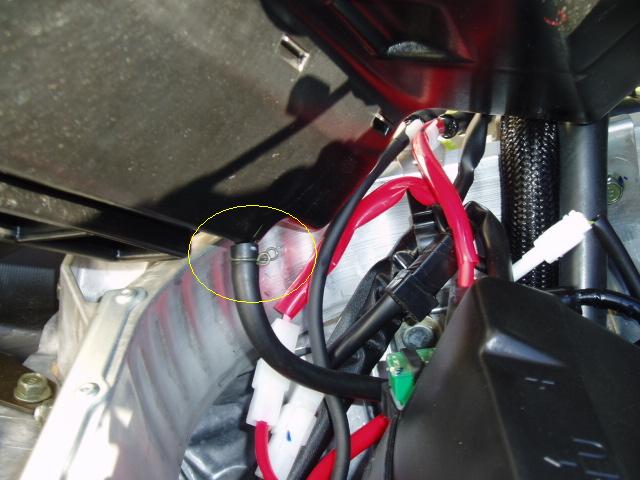
Lastly we will unhook the drain line running from the bottom of the air box and
the air box is now free and removed!

![]()