Procedure for Replacing your Track
| Remove skid frame (Suspension) See tech page for Installation of Suspension. | |
| Remove Belt cover | |
| Remove the 2 set screws that hold the bearing on the drive axel from underneath the sled. These set screws are on the bearing color on the speedo side inside the tunnel. You may have to roll the axle to get the alignment you need. | |
| Remove speedo cable from the axel under the secondary near bottom of the belly pan. Then remove 3 nuts that hold speedo cable cover over non drive side of axel. Careful to pull speedo key (Square key about 1 1/2 long) remove key from axel after cover is pulled. | |
| Then go to the chain case side. Remove exhaust , might have to remove battery if you have electric start. | |
| Remove 12 mm drain plug from back side of chain case ( reach underneath in the tunnel and you should feel the bolt head), drain case oil. Remove chain case cover bolts. Then pull on cover very carefully. Make sure you have a drain pan under the sled, there will be some oil that will come out. If you have reverse you have to be careful of the shift linkage and how it come off as you pull the chain case cover. | |
| Make sure as you remove , linkage, gears, spacers, nuts, chain, chain tensioner and so on, that you lay them out exactly as you have removed them. (Note: Crack the chain tensioner jamb nut loose and screw it out all the way leaving jamb nut on. Also the tensioner when reinstalled will need to be finger tight before locking jamb nut.) | |
| Remove the top bolt that holds the top gear to the brake drive axel and remove the bottom bolt that holds the bottom gear to the bottom drive axel. If need be use the brake to hold the axel steady while you brake the bolts loose. | |
| Remove the brake caliper and parking brake cable and flip it out of the way. The brake line can stay on the main brake. | |
| Now remove the main bolts that hold the chain case to the tunnel. Then pull back on the chain case slowly and evenly, it will be very snug. Be careful and watch for the key that holds the brake disc to the shaft as you pull the chain case back. Be sure all nuts, gears , chain, chain tensioner, spacers.... ect are removed prior to pulling chain case back. | |
| After chain case is pull bake and or removed then go back to the speedo side and pull the drive axel thru the speedo cover hole and the 2 set screws that hold the bearing on the drive axel should have been removed prior. Then pull bearing, if tight use a 3 jaw puller to assist you. | |
| After bearing is out you should be able to push the drive axel all the way to the speedo side and tilt the shaft down and out. Now your track should be out. To install use the same directions and work backwards. |
Tip: When removing the chain case spray behind the chain case on the Jackshaft around the keyway with WD-40 or some other penetrating oil. The key rusts into the keyway and sort of locks it on, this may help.
Note: If you have adjustable rods you can crank them up to help with clearance. Also using a ratchet strap or come-along off ceiling will help support rear of sled while removing track and suspension. A few more tools nice to have is a shop creeper and hydraulic jack to help support suspension as your dropping it from the sled.
Click on the Images to Enlarge
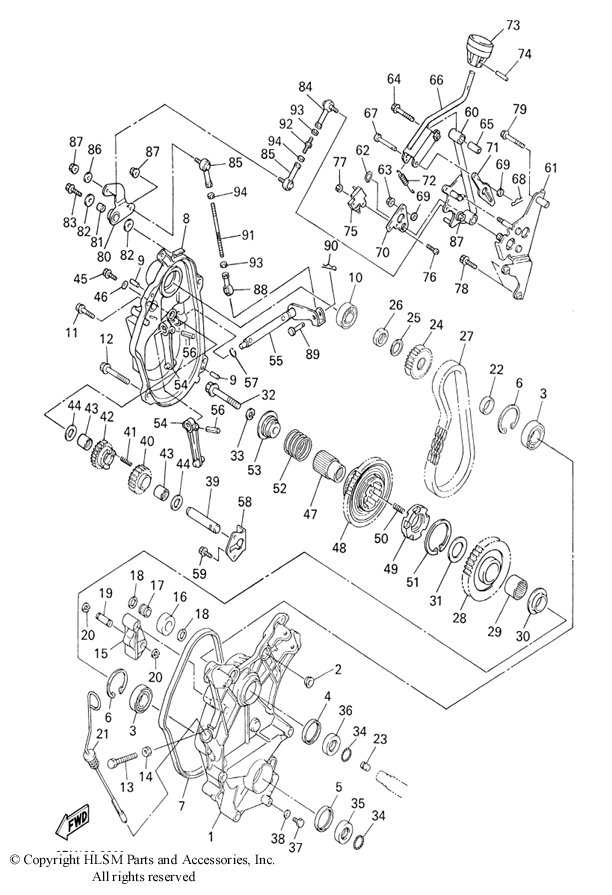
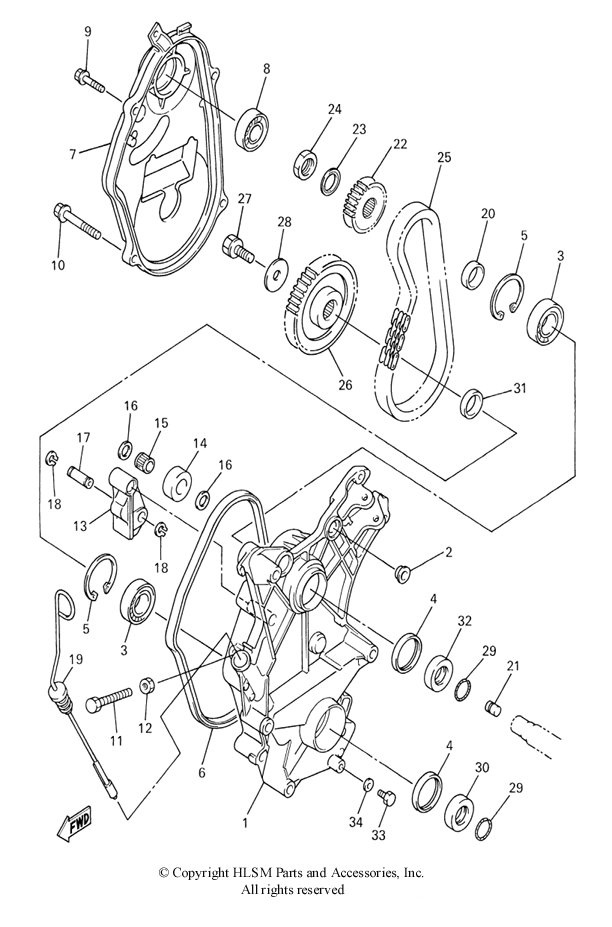
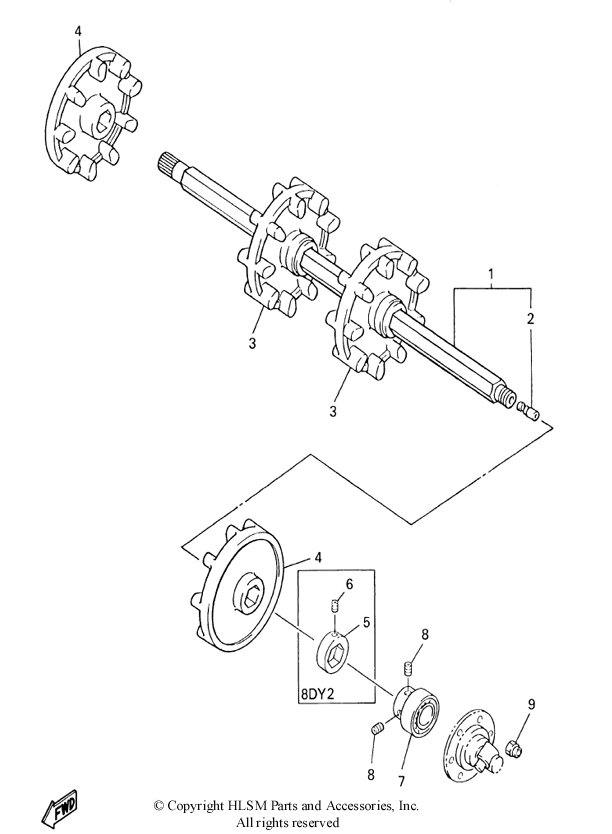
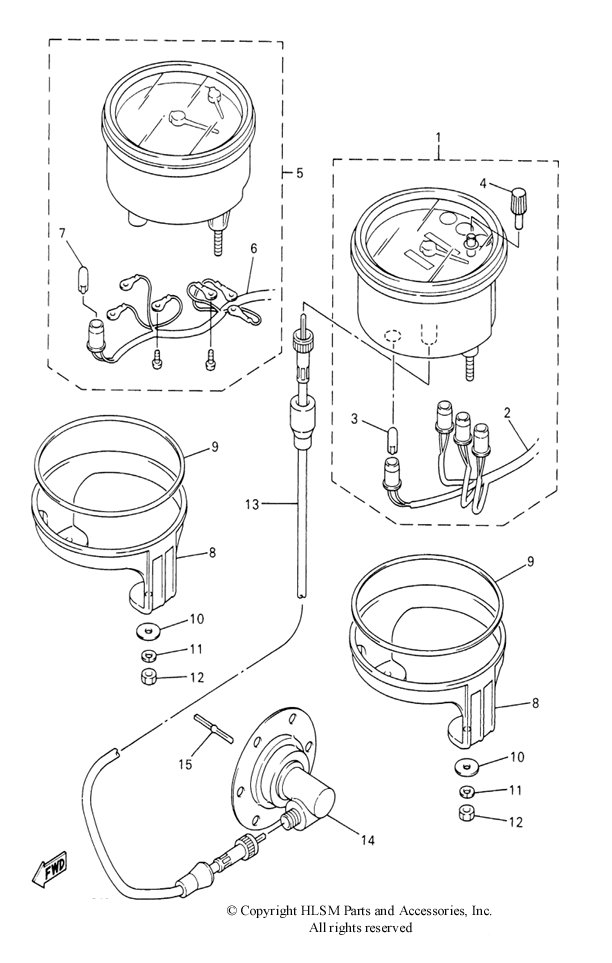
Image1 : Chain case w/reverse, Image 2: Standard chain case, Image 3 : Track Drive shaft , Image 4: Speedo
Go to http://www.hlsm.com/ for more info on Yamaha Parts
Totallyamaha is not responsible for any damages that these modifications may cause to your vehicle; any modifications are your responsibility if you choose to do so. We are providing information ONLY. Some of these modifications may VOID your warranty and that is your responsibility to look into. The Totallyamaha users have passed along most of the information found on this site. If you have any questions or concerns about anything on this site talk to your dealer before using any of the information. Totallyamaha will not be liable for any damages or personal injury from any modification performed from this site.
![]()