Viper Fuel Pump Fix and Fuel line Tech Update
Viper Fuel Pump Fix
Vipers have been having a problem with fuel pump freeze up. My dad's has done it
twice so far. After the first time he dumped in a bit too much dry gas and one
cylinder went pop. The service tech told us about this modification to fix the
problem of the fuel pump freeze up. He performed the mod but did not do it very
well. The pump still froze up. After the second time we decided to redo the
modification. The following is a process for doing the mod. Sorry for the length
of this but it is all necessary.
First thing I will list tools require for this job:
-Phillips head screwdriver (preferably magnetic)
-flathead (not required but may help)
-10mm wrench
-10mm socket (deep well, not required but highly recommended)
-silicon sealant
-rubber piece (we used old radiator hose) and/or 2 10mm nuts as spacers
-magnet (not required but recommended)
-a drill bit and drill (sorry i forget the size used)
Step One:
Ok now after gathering what you need use the Phillips head screw driver to start
taking apart the air box. There are 4 separate parts to the air box not
including the air filter. The top of the air box has 4 holes in the seal around
it. Use the Phillips head driver to remove these 4 screws.
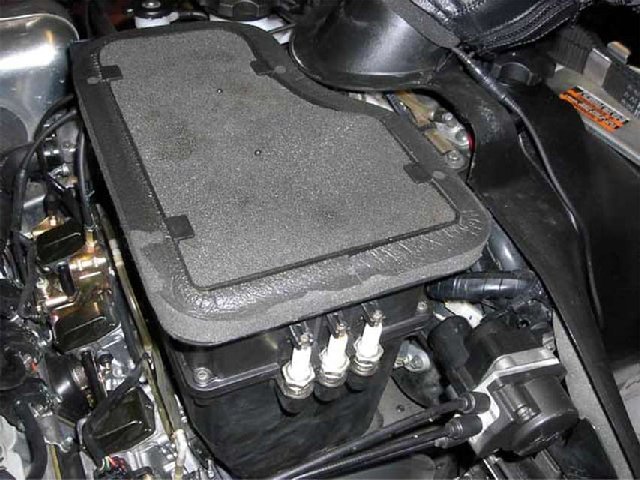
Step Two: Be very careful not to drop any of these. Believe me it is not fun trying to get
them out of the belly pan. This is where a magnetic screwdriver or magnet can
come in handy to prevent them from falling into the belly. Simply remove this
top part and Set aside. If you want to clean the air box also then remove the 6 screws in the next part
of the air box. They are all
around the air box and make sure you get them all.
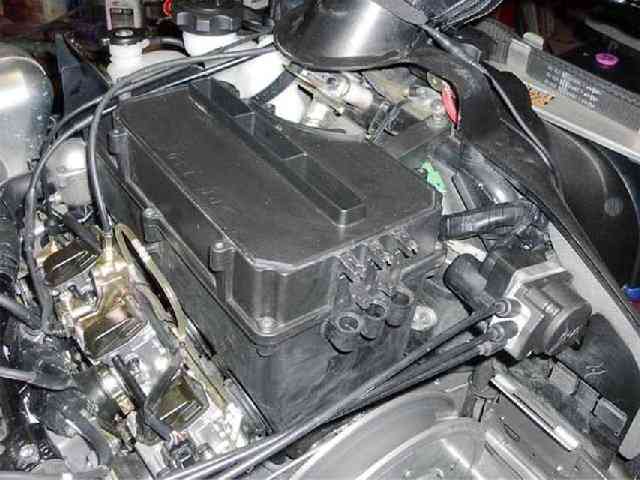
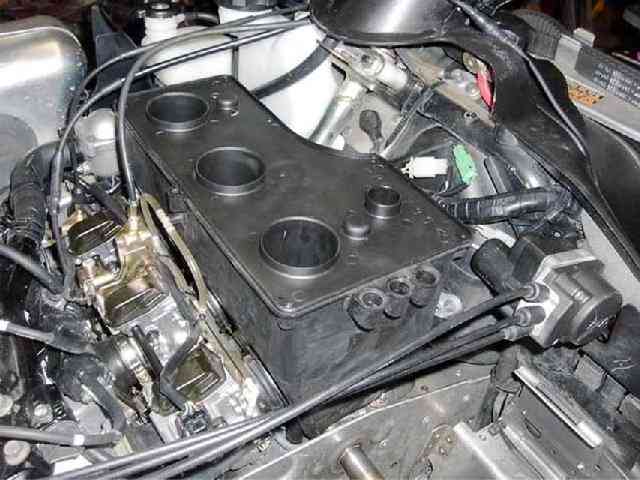
Step Three: Now don't attempt to
remove the air box yet there is 1 - 10mm bolt holding this air box part on yet.
The bolt is on the left side of the steering column if you look at the above
picture it is right below the red thumb and hand warmer wire. Remove it and set
aside.
If you want to clean the air box continue on, if not skip to Step Four. Slide this stage of the air box off. Be careful because on the right
side (looking from seating position) cables run over the air box and are held in
place by a plastic clip. Simply lift the opposite end of the air box and this
will not be a problem. Now pull the cones out of the air box.
These will easily be removed with no tools. Now look into the air box. You will
see 3 rubber boots from the carbs to the air box.
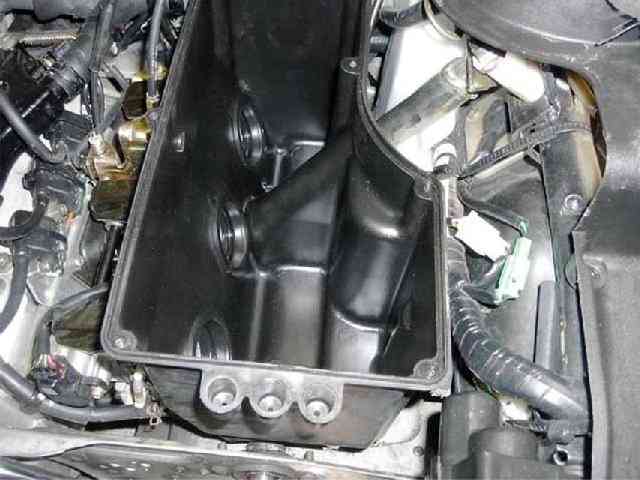
Simply push these out of the box and pull the air box out gently. Now you should
be able to see the fuel pump next to the secondary clutch. (as shown in this
picture)
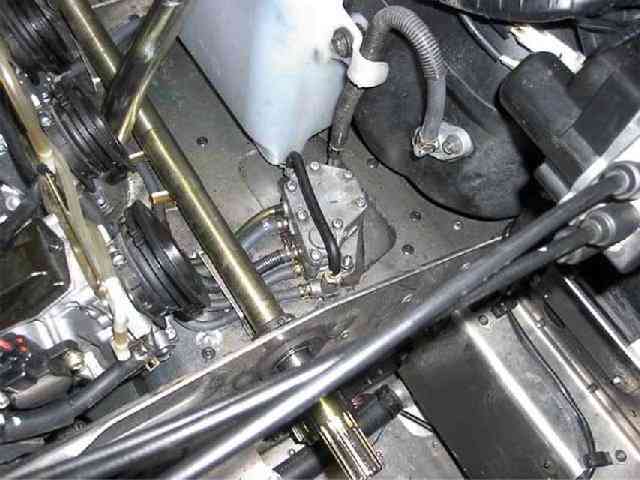
Step Four: Take your Phillips crew driver and loosen the boots from the
carbs and leave carb boots attached to the air box. Lift air box out of
the way unless you have taken it out during cleaning already from above
directions. You don't need to disconnect any of the hoses on it for this mod.
Simply use the 10mm deep well socket or wrench pull of the 2 black nuts on the
golden bolts off. Lift the pump and flip it over. This should be easily done
without disconnecting hoses. Note there is a hole in the center of the fuel pump
where a stud on the bulkhead fits in. Take a piece of paper and place it on the
bottom of the fuel pump to make a template. There should probably be grease or
something else on the bottom to help transfer the image. This does not have to
be exact in fact a little extra around the edges is probably a good idea. Now
cut a section of hose or rubber off to the size needed. In the case of the hose
slit the hose and lay it flat. Then place the template on this and trace. Cut
the rubber to shape then drill holes in the rubber with your drill bit. You can
determine the size bit needed by simply placing the bit inside the hold on the
pump till you find the right size. Drill 3 holes, 2 for the golden bolts, and 1
for the center stud that is supposed to plug the hole. Now that this is made up
place it over the golden bolts and stud and make sure it all sits there or
another idea instead of the rubber gasket is to place 2 new 10 mm nut back on
the studs and tighten them down to the tunnel then place your fuel pump back on
and tighten the upper 10 mm nuts that held the pump on. This will space out the
pump and prevent water from puddling and freezing pump.
![]()
Place the pump back down and make sure your material is not too thick as to
prevent the nuts from threading back on. Now take your silicon sealant and start
to plug the hole on the bottom of the pump or if you use the nut spacers method
silicone may not be needed. Keep spreading it in there multiple
times to get a good amount in there to seal it up.
Then spread a bit more around the outside of this same hole and place the pump
back on the rubber and bolts while still wet. Simply bolt the fuel pump back
into place. In our case you could see a bit of silicon coming out the sides when
I really tightened it down. That is it for the pump. Now I would recommend you
clean the inside of your air box out with carb cleaner. There is no need if
yours are not dirty. Our Viper was grass dragged numerous times so it got a bit
dirty. Now simply put the air box on in the reverse order you took it off. The
flat head can come in handy to help put the rubber carb boots back on the air
box. This is a very important part and should not be neglected. The boots have 3
rings 1 tall on the outside 1 short in the middle and 1 tall on the inside of
the box. Make sure your box is set in the middle smaller groove so the bigger
ones seal the box. This may take a bit of work but is easily do able. We had 2
people doing it and I feel it was easier that way so that may be recommended as
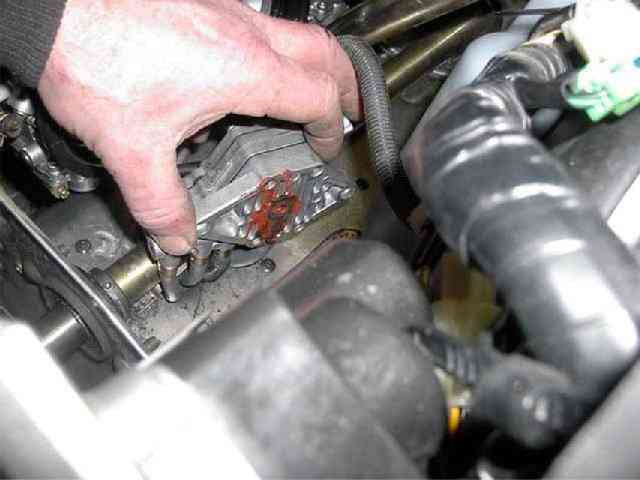
well. The picture above shows the proper mounting of those rubber carb boots on
the bottom air box stage. Now just put the rest of the air box back on and you
are set. You should probably let the silicon set for a bit before using the
sled. This is not a guaranteed fix but has been recommended by many people
including Yamaha Technicians. The entire part of the rubber between the pump and
bulkhead is our own addition and I recommend it since the metal the pump is
mounted to is Very cold and not heated at all.
I should mention one or two things. One we went back and added a second layer of
rubber. My dad wanted to lean towards the safe side so he decided to add more.
Personally I think 1 layer should do fine but 2 layers is probably better. Or in
some cases just a thicker amount of rubber. Also in some of the pictures the
secondary clutch is removed. This is not at all necessary for the modification,
we were doing some clutch work and just happened to have it off as well. I would
like to state that I am dissatisfied with the fact that this is required to make
the sled perfectly. Yamaha should have tested maybe another season or a little
more. That probably means my dad would have gotten an XC 700 but that is a good
sled so we would have lived just fine.
Donated By: Sled_Dog
Totallyamaha is not responsible for any damages that these modifications may cause to your vehicle; any modifications are your responsibility if you choose to do so. We are providing information ONLY. Some of these modifications may VOID your warranty and that is your responsibility to look into. The Totallyamaha users have passed along most of the information found on this site. If you have any questions or concerns about anything on this site talk to your dealer before using any of the information. Totallyamaha will not be liable for any damages or personal injury from any modification performed from this site.
![]()