Cleaning Carbs by: crewchief47
|
This process involves my 2000 Venture 600. Over the years Yamaha has used/re-arrange various items for whatever reasons. These instructions may not apply directly to your sled but should be similar enough to use.
1) Remove handlebar pad 2) Disconnect throttle and oil pump cables. Pull them back into the engine compartment. Pay attention to the routing. 3) Remove air-box pre-filter if you haven’t already. 4) Disconnect electrical connections from CDI box, coils, and TORS system. Your wire harness should pass above the CDI box and is held in place by a re-usable wire tie, you do not have to cut the tie. Pay attention or write down the wire colors for the coils and TORS, they use the same style bullet connectors. Notice the routing. 5) Remove the bolt at the back top left of the air-box. 6) Remove the two screws that hold the Heated Carbs valve onto the air-box and move the valve out of the way. 7) Loosen the three screw clamps, for the carb boots, closest to the air-box. 8) Remove the air-box from the sled and set it aside. 9) Loosen the throttle cable and choke cable jam nuts. Unscrew both from their brackets, be careful not to move the jam nuts too much as it will help keep your cable slack adjustment in the re-assembly process. 10) Disconnect the heated carb coolant lines, one on each side. Plug the ends so they don’t leak coolant. Golf tees work good for this. TIP: If the hoses are difficult to remove, grip them lightly with a pair of pliers and rotate them on the spigot they mount on. The hose should rotate once broken free and come off easily. 11) Disconnect the Fuel lines at the carbs. If you are having problems, see the tip in step 10. 12) Drain the fuel from the bowls by loosening the Phillips head screw at the bottom of the carbs. You can skip this if you don’t mind spilling fuel all over your work area (make sure you have some rags). 13) Observe the routing of your oil pump cable. 14) Loosen the three clamps that hold the carbs to the intake boots and remove the carbs. Congratulations, they should be on the bench. 15) For cleaning the carbs, some spray carb cleaner is useful, some compressed air, an old toothbrush works pretty good for the tight spots, a small screwdriver to use as a scraper, and small diameter wire to clean out the jet holes. I have a full fractional/letter/number drill set that I use to clean the small holes in the jets. You need to be careful because you don’t want to enlarge any holes. 16) Remove the four bowl screws and re-move the bowl. If you didn’t drain the bowls earlier, it gets a little messy. The bowls use a rubber o-ring style seal that is re-usable. 17) Inspect the bowl for any crud. It should be shiny everywhere inside of the gasket. If it looks like your fourth grade science project in there, you have your work cut out for you. Lightly wipe down the gasket surface so there are no large pieces of debris. Set the bowl aside. 18) Avoid putting much pressure on the floats and their arms though this whole process as I feel float adjustment goes a little beyond what this article is trying to do. If you want to check it, here’s a link: http://www.totallyamaha.com/snowmobiles/aaTECH/floats_adjust/Carb_Float%20Adjustment.htm 19) Remove the little plastic thingy off the main jet (Yamaha calls it a washer?!?!), it just pulls off. 20) Remove and clean the Main jet using a screwdriver that FITS WELL to remove it. You should be able to see through it when held up to the light. Now would be a good time to write the jet number down if you bought the sled off of “Joe Racer” so you can compare it to stock. 21) Remove and clean the brass cup/ring under the main jet. It should just pull off easily. 22) Using a smaller screwdriver, that FITS WELL, remove the pilot jet. The aluminum pipe should come off with it. Clean the jet good. Besides the hole through the middle, there are a series of holes at the smaller end that need to be clear. Now would be a good time to write the number down from the pilot jet. 23) Remove the fuel screw BUT only after counting the number of turns it takes to bottom the screw (tighten, but only lightly). It should be between 1.5 to 2 turns from bottomed. DO NOT USE ANY FORCE. You will know when it’s bottomed. Make sure you remove the spring, washer and o-ring before you blow out the carb, unless you want to look for a needle in a haystack, followed by a trip to the dealer to order small replacement carb parts. 24) Clean out the ports you’ve opened up with the carb cleaner and air. 25) Re-install the fuel screw, pilot, and main. 26) Wipe down the bowl mounting surface on the carb. These two surfaces need to be clean of debris for a good seal. 27) Re-install the bowl and screws. The screws do NOT need to be gorilla tightened, you’ll mess up the screw head. 28) Re-peat for the other two carbs.
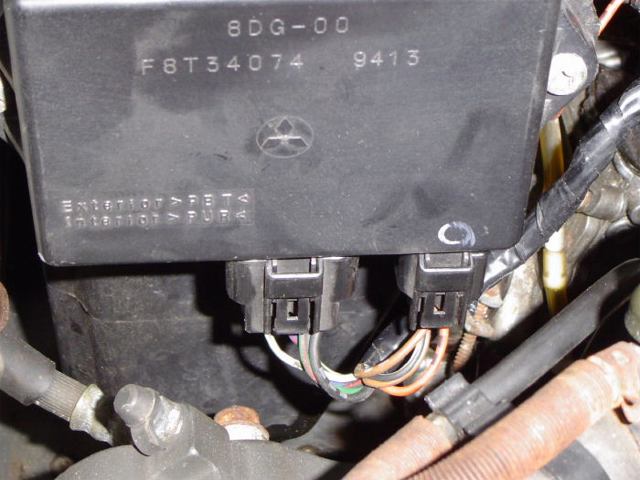
Re-assembly: 29) Reverse the removal process until you get to the air-box. 30) When you are ready to install the air-box, remove the screws from the top (7 on my venture) and split the box open. Set the top and divider pieces aside. 31) Place the bottom portion of the air-box in the sled, making sure that the carb boots slide all the way onto the box. This is why I split the box, it makes it much easier to get the boots on properly. Tighten the screw clamps. 32) Re-install the divider. 33) Screw the air-box top back on. Take your time, some of the screws are a pain but if you rush it and drop a screw, you may have to pull the box back out to find it. 34) Continue reversing the removal process.
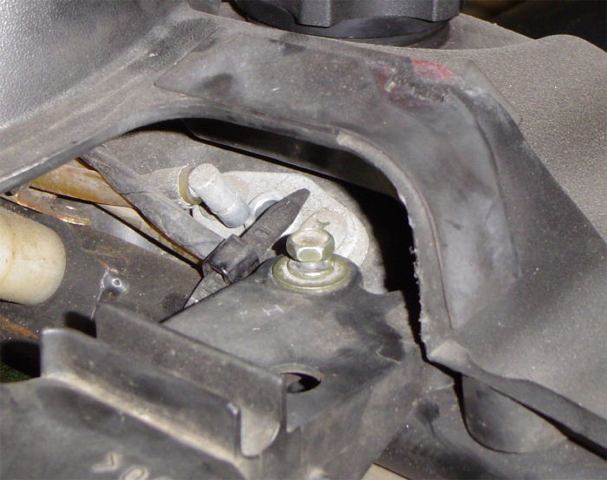
NOTES: 1) Don’t forget to hook up the fuel lines. 2) Don’t forget to hook up the coolant lines. 3) The throttle and choke cables may need to be adjusted for free play. 4) Other parts of the carb come apart but these basic few should get you running. 5) The sled these pictures are from was stored in an attached garage and fuel stabilizer was added to the tank. The sled was then run for ten minutes to ensure treated fuel made it to the bowls. Half the battle of sled storage is keeping it out of damp places. If you remove your carb bowl and they appear as clean as these do, it's likely you can just put the bowl back on and check the next one.
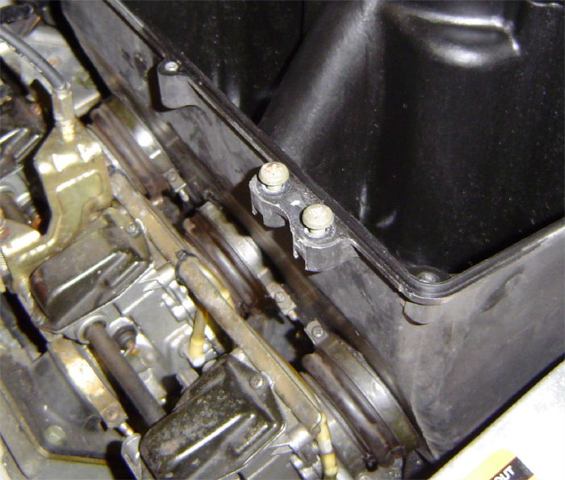
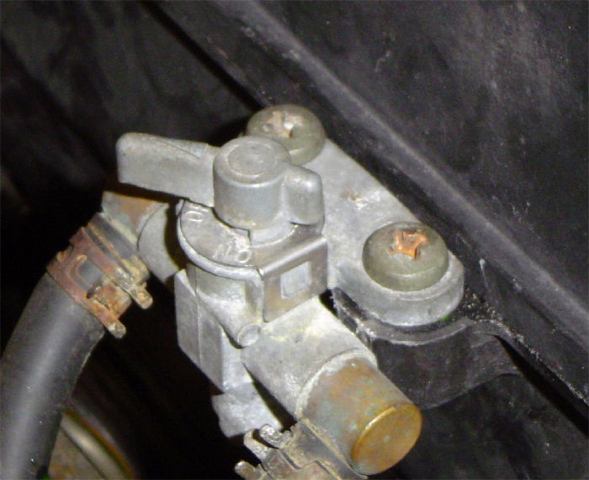
|
|