Mono-shock Skid Install for Pro-action sleds
Tool Crib:
-A NICE set of drill bits. I used a set from DeWalt because they have pilot tips and were nice and sharp. The pilot tips made it a lot easier to drill the tunnel and not slip, pretty important!
-Hole saw for the dial adjuster
-Power Drill, cordless is easiest
-A NICE rivet gun. I went and bought a Craftsman Professional because I wanted something strong and with good leverage. Those tunnel rivets are HARD to snap off!
-A piece of wood cut to 16 1/2”
-Set of ratchets
-Dremmel or some kind of grinding tool that you can get in tight places
-See Parts List! I have a parts list with the needed parts (brackets, rivets, etc) to install the skid, see that for part #’s etc.
Now, there are a few things to know right off. This is by no means the only way to do it. It is the way I did it, it worked pretty well, and I put 1500+/- miles on it with no real issues that I have seen so far.
First off, be sure to keep the rear shaft insert from your old Pro-action skid, it is the one that the rear bolts go in to hold the skid in place. it is a little wider than the shaft on the mono and is needed to keep the spacing right. That shaft, the spacers for that shaft that slide over it, the half moon brackets that go on the tunnel where the rear bolts go, and the bolts themselves are all that is needed from the stock skid. Everything else needs to be bought to install the Mono.
I first drilled out the rivets on the original front bracket. They can be seen in the pic below. They are the holes that form a triangle around the middle mounting bolt hole. I also ended up needing to drill out the holes that hold the top of the foot-holds in, as well as whatever else wouldn’t clear the new brackets. more on that later.
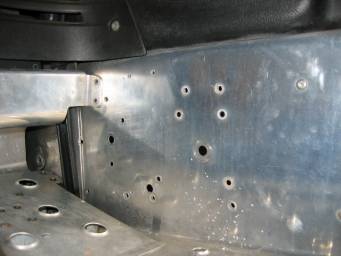
I then put my template in the inside of the tunnel and drilled the necessary holes needed. The template I used has holes that line up with the middle and rear holes. You put the bolts in these holes to hold the template there and drill the new front holes! It is just that easy! The Mono uses the stock rear holes, so it really is an easy install. Feel free to PM me or email me for a template. All I ask is the money to cover shipping and the piece of metal to put the template on!
Now that you have the holes drilled it is time to install the new mounting brackets. Put the brackets in the tunnel, line them up with the two holes you just drilled, and see how it looks. You will find that it won’t clear some of the original front brackets and rivets. Mark the rivets that it doesn’t clear and drill them out. Some are easy and can be gotten from outside the tunnel, and some are hard and require you to drill them from the back side (inside the tunnel.) This is not easy so just remember to take it slow and steady. You CAN do it! You will now need to trim the original front brackets so the new ones clear. See the pics below.
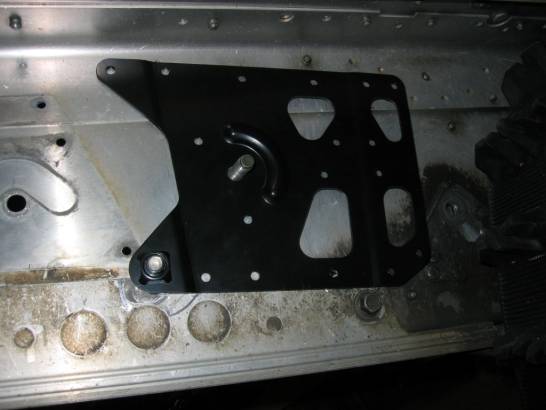

You should now be all set to bolt it into the tunnel and use it as a template to drill where it will be riveted to the tunnel. Check before you drill to make sure you are drilling a place that you will be able to get the rivet gun at from outside the tunnel. I f you can’t get a rivet in the hole, it isn’t worth drilling! REMEMBER TO PUT THE TRIANGLE SPACER BEHIND THE BRACKET BEFORE YOU DRILL FOR RIVETS OR INSTALL THE RIVETS!!! I didn’t do this and had to drill out new rivets I had JUST put in! Once you have the brackets bolted and riveted in, you should take a step back and admire the progress, you are getting really close to a SMOOTH ride with less weight!!
Now that the new brackets are in, you will need to go back and see which rivets wouldn’t clear the bracket. You will need to drill the bracket so that you can install those rivets again, and this will require you to drill through the new bracket. Pretty straightforward, as with the bracket installed you use the tunnel and old holes as a template.
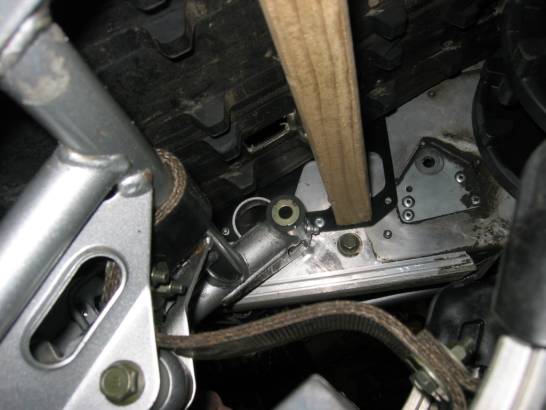
Next you will need a piece of wood cut 16 ½” long. I used a piece of wood left from a deck railing and it worked out perfect. You need to wedge this into the tunnel above the bracket to spread the tunnel slightly to allow you to slide the new skid in. This is due to the fact the new brackets are taller than the tunnel and are actually installed sideways. This means there is a lip you need to clear that wouldn’t be in the way on an apex with the bracket installed upright. I have since been told it might have been easier to trim the new bracket. Maybe so, but this is how I did it and you can choose either way!
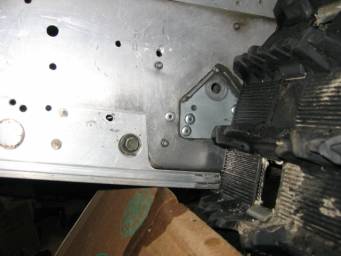
As you can see in the pic below, there is one rivet you should leave out so the skid can slide in unimpeded. I learned the hard way and had to drill it out. My mistake is your advantage! Learn from it! See the pic below!

Once the wood spacer is in place you can slide the front of the skid into place and bolt it in. Exciting, isn’t it?!? We are ALMOST there!!
Now that the front is bolted into place remove the wood spacer, you are done with it! keep it in a safe place to use next time you need to take the skid out for service!!! It will be needed!
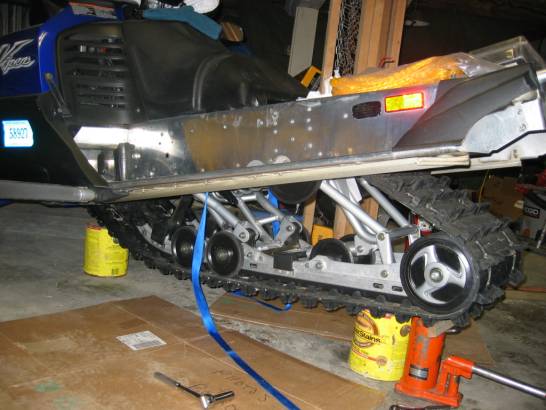
Now you are nearing the end. Install the Pro-action rear shaft into the Mono and put on the spacers. I set the skid on a couple of paint cans to hold it up and lowered the sled down onto it.
I then used a couple ratchet straps wrapped around the skid to compress the shock. I have been told that you can also undo the transfer rod to get the tension off so the rear bolts line up with the holes. Whatever works for you and makes you happy.
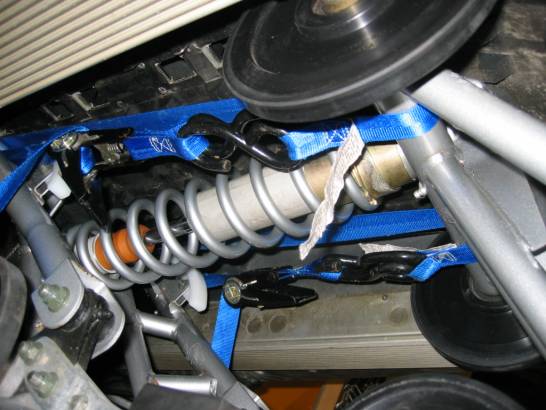
I found the straps to work well for me as it was easy to keep adjusting it until everything lined up perfect. All that is left is the dial adjuster.
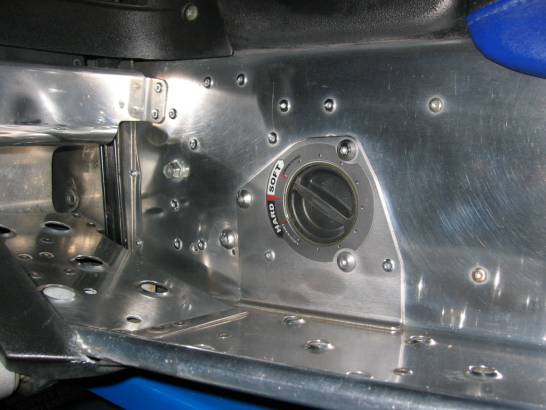
Now you need that dial adjuster in there to take advantage of the easy adjustment of the Mono. This part seemed really straightforward. Take the mounting plate that mounts on the outside of the tunnel. Set it up and eyeball it to make sure that the rivets will clear the mounting brackets for the skid itself. Drill the holes for the two rivets on the plate. Rivet the plate to the tunnel and use it as a template for the three remaining holes for the screws. With a nice SHARP hole saw and using the plate as a template, drill a hole for the dial adjuster. I used the Dremmel to make the hole edge smoother and a tad bit bigger. Place the dial adjuster in the hole from behind and mount it with the screws. Now hook up the cable to the shock and BE SURE IT IS ON TIGHT!!! I also learned the hard way on this one and the cable fell off while I was riding. It then caught in the track and got chewed up pretty well. Not fun, or cheap.
The skid is done! Clean up, remove the straps if you used them, double check the tightness on everything, and enjoy your near 14lb weight savings and new and improved ride!